FM15 – Adapting your way to a successful run

Can you take one tactic and win every single match all season long? Unlikely. What you can do is take one single tactic and adapt to the conditions of the game and try to win every single match, the chances of going on a massive winning run? A lot more likely. In my case I usually have a win ratio of 75% in all competitions.

Last season for the first time in a long time, we fell behind a rampant Chelsea, they only lost 1 match, drew 2 and won the rest. It was such a blistering pace we fell apart because I played like an experimental manager, willing to try different kinds of systems all season long. We did get revenge on Chelsea in the Champions League final, but it was a narrow win. I am hell bent on exacting my revenge on Chelsea. They beat us to the title by a whopping 10 points eradicating our points record, its time to dish it out…they are our next opponent.

A post on the forums made me think. Someone asked me for my Team Instructions and a list of OI’s. Now I know I’ve said these are important, but these in isolation do not make your tactic better, and neither does a magical combination of PPMs. Yes you need a system but without a strategy to USE the system its half as good. What one needs is a plan to handle what the AI throws at you. You need to know what to expect and then you change to adapt. Now I will admit its really hard to spot from the 2D screen, but there is a way to make it easier. I don’t consider this a cheat of sorts but I do reckon that the information is already visible on the 2D screen, you just need to spot how the dot behaves in FULL MATCH mode. The problem is very few people have the patience. The reality is that in modern football you could probably spot who the playmaker was or which fullback was more attacking if you were watching the whole game from the stands. So in all fairness I think this approach is quite helpful. What you need is skin that shows you the opponents ROLES, like Scorpio.

Time to run through another game and go through each step, I won’t be doing this very often because its intensely time consuming, and personal commitments are straining me at the seams, but here’s what I can offer for now. This post alone took me almost 3 hrs to do. The game was played in like less than 10 minutes.

I typically start each match like this, but we are going to be against Chelsea, and I can’t field my top 2 strikers, fatigued after Europe, which is a bummer.

Chelsea1


Chelsea are set out interestingly, the plan will be simple: isolate their defensive group from their attackers. Since they are playing a support styled play, they need to be in my half to be a threat, so if I switch to an attacking mode then i can press the game and deny them the space and time to threaten me. So I elect to minimise OIs, by just doing this.


Chelsea2


Chelsea3


My TI’s are set up for me to press higher up the pitch, the idea is to deny them any space to build anything of import. Its a simple plan. I choose work into box, because I want to minimise crosses. We will play a high tempo match, but again, I will be wary of fatigue.

Chelsea4


12 minutes in and I am a happy bunny, everything is working as planned, their defense is under pressure, Chelsea have hardly left their half and we’ve already blown one gilt-edged opportunity. I check on their formation and there aren’t any major changes. We wait, something should happen.

Chelsea7


30 minutes in we score, Chelsea have only managed one shot on goal thus far. I spend a few seconds admiring our goal which as expected begins from a loss of possession and a quick thrusting move through the middle to score. I immediately turn to look at the oppositions tactical screen, it should change, but it doesn’t…we keep this going till the end of the half. I go into half time thinking they will change their tactic, so I set my match to full match mode, to buy me time. Right at the start of kick off, I spot Chelsea’s change.

Chelsea 8


They’ve gone mental with a 424, against a 4312 it can be a problem with the way I am set up. I immediately make what I deem to be key OI changes. The goal now is to completely isolate their two defenders and the 2 central midfielders. By closing them down and hard tackling them, I can remove their influence on the game. The defense needs to punt the ball up, so I know we need to change things around ourself in terms of our shape.
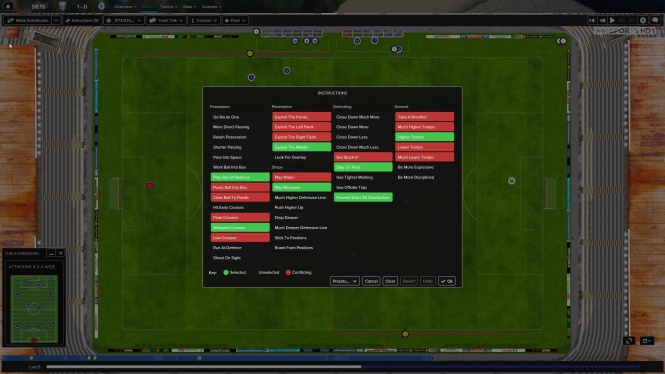
chelsea11I go counter and my two fullbacks are put on support. The goal now is to contain, so no more high pressing from everyone, only the strikers do the high pressing, and with the OI changes we are set to play a different kind of game.

Chelsea10


A rapid counter attack from us following a failed Chelsea attack produces our second goal. not too long after the restart. It slowly becomes a match we dominate.

Chelsea12

Chelsea14


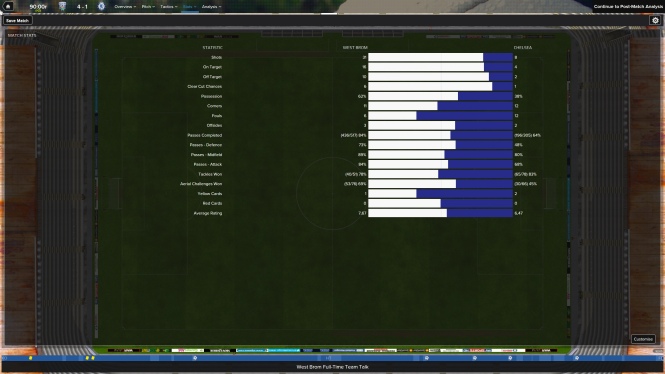
They manage to score one goal, but with 6 clear cut chances, I know we should have scored more while winning it 4-1. The counter attacking strategy worked when they hopped to an attacking 424.

Chelsea16The boxed players are the ones I was aiming at. Reducing their influence on the game was my priority. And nothing absolutely nothing, beats getting one over on Mourinho.

chelsea15

So there you go, in a nutshell with a lot of screenies, showing you how one should adapt to changes in a game. If you can learn how to see what the AI is trying to do then it makes it really easy. And once again the skin I use is called Scorpio.

Oh and I have time for one more addition…into the next match, an away Champions League tie to Wolfsburg. Fewer screenies now. They are set up as a 442 with an overlapping fullback on the right flank. I expect him to overlap because the midfielder is on a support duty. So I instruct my fullback to go play as a fullback on support. The whole 442 is set up with quite a few support roles and this tells me that in order for it to do well against me, it needs time to build up play. They are at home as well, so I do expect this team to play a lot better than Chelsea did. We stick to an attacking framework apart from that one small change to the fullback who’s set to cover for the opposing fullbacks overlapping runs. My shouts are simply the attacking ones I used earlier against Chelsea.


2 minutes in I am forced to bring on a 19 year old player for his ECL debut, replacing my key player Nathan, who’s stretchered off, but I am not upset cos M. Perkovic has a blinder.

Once again the only thing I do is adapt my system to the one the opposing team is using. I change mentalities and make some minimal OI sets, that only focus on wrong footing their strikers and we are off…for a 4-0 away win.

Wolfsburg


FM 15 Spatial Control and Shouts

Seen so many posts lately, that suggest people are still confused. One of the most important things in FM is understanding spatial responsibilities. And people spend far too much time still trying to think in terms of sliders. SI made the tactical creator for a reason, to make things easier, and if people can’t come to grips with it, its just going to make the whole process more frustrating.

Control of space is vital in football. Over the weekend, Brendan Rodger’s took his side to the Liberty Stadium, having been playing a 3412, they found themselves struggling to control midfield in the first half of the game. Swansea, had gripped the midfield tight in the first half forcing Liverpool to swap to a different system with Gerrard inserted back into his deep playmaker role. They regained control of midfield and exerted themselves on the game, increasing their shots on target count.

FM isn’t anything different, sometimes you need to change systems. I have done this so many times I’ve lost count. If I lose control of midfield, I will always look to reasons why, and most times it may just be a simple tweak of roles or it could be a complete tactical overhaul. But, what do you do when? To understand this, you need to understand spatial control.

Roles

Players have basically 3 roles in a game, defend, support and attack. Each affects their starting point from where they defend. This is the starting point for every system. from here you need to factor in attributes, to understand why players don’t drop back or support. Lets take a simple example to begin with.

Wingback

This is a simple illustration of the fullback role. What I cover here, can be applied to all positions on the tactical grid, which is a great tool to understand space. The fullback position has 4 different roles: Fullback, Wingback, Complete Wingback and Inverted Wingback. Each plays different, but here I just want to focus on defending.

The fullback has the deepest starting point for defending and the complete wingback has the highest point on the grid,  By choosing a fullback with a defend role, you are effectively telling him to defend from as close to the defensive line as possible. The complete wingback with an attacking role defends from further up. This effectively grants space to be exploited or limits it.

During the course of any game, you may find yourself defending against Wingers or Inside forwards. And if these players have the speed you are going to find it hard to defend if they get behind you. If there are times such as these you may find its better to drop their role. However, dropping their role also leaves you with another problem, it creates more space between them and midfield, forcing them to either pass back to the middle or hoof it up. How then do you solve this issue?

Going back to Brendan Rodger’s, he opted to have 2 holding midfielders in his 3412 system. This effectively allowed his wingbacks more latitude to bomb down the wings. While some people on the forums may argue that one only needs one holding midfielder. I disagree, There is no hard and fast rule. What one needs to do instead is understand how they want to play and what kind of players they have. If you want to use 2 explosive wingbacks you need 2 anchors. Even if you employ one anchor in midfield he still needs someone close by to lay off the ball to if the wingback is out of position. In any system that employs dual wingbacks or attacking fullbacks, you absolutely need 2 players who can fulfil the anchor role. The anchor role can come in many forms, the more popular one is the BBM, you can also use the BWM on support or on defend.

Spatial Control

Control of space happens first from the positions that you have chosen to use. The second thing we need to address is attributes. Just because you stick a dot in a holding role, doesn’t mean he will always assist. This is where teamwork and anticipation come in. The teamwork attribute is vital if you are running any system where you expect a lot of support roles to succeed. Teamwork affects whether a player will drop down to assist another player. So if a fullback is defending and he needs support, a player with high teamwork will be unselfish and sacrifice aspects of his role to assist another. Anticipation then makes it better.

That covers defending, what about attacking? Here you need to pay attention to the attribute workrate. If you have a system with a lot of OTB running, and you are playing short to direct style of football, whether or not your players move up to assist is a function of workrate. The higher the work rate the higher the likelihood of them assisting. Of course there  are other attributes at play here, like pace, acceleration, vision, and decisions as well, work rate however is the prime attribute.

Putting it all together

Taken together, these concepts affect your with ball and without ball situations. When I am playing a really tough side like Liverpool, Chelsea and Man City  I opt for systems that optimise control of space. I forgo anything which uses AMs unless I plan to camp in their half. Thus far, I am not entirely comfortable with my WBA side to do that. So I have gone for a more Rodgersesque system, which relies on workrate and teamwork to play a lot more defensively. For a while I was using a 4312 system that employed one DLP and one BWM (S) and another CM(A), but as the season wore on I realised  that my wingbacks whilst glorious in their attacking flow, were frequently short-changing me in defense – we were conceding a goal nearly every game.This necessitated a slight change to my system. I experimented with a BWM(D) DLP BWM(D) combo in midfield and discovered it looked fantastic in defense, but it wasn’t so solid in attack frequently leaving only the fullbacks and the 3 upfront. When I changed the BWM to support, things changed. We suddenly began not only shutting them down, but also leaving them clutching at air when they tried to get the ball back.

Spatially I had made the mistake of relying entirely on one fullback on one side of the pitch to do all the defending on that side, but once he got support from a BWM(S) things changed.

This would not have been possible with a side with low teamwork.

Shouts 

They have the ability to strengthen or completely displace your spatial control. One needs to understand what the shouts do and once you are comfortable with them, don’t go messing with them unless you know what effect they are going to have. Lets begin with a combo:

  • Retain Possession
  • Short passing
  • Play out of defense

These shouts make your passing super short, if you combine them with tempo you get lot of zippy passing, if you add the shout: “pass into space” thats when problems can start.  Whilst the combination affects your possession, pass into space, increases the through balls your players will try to find space behind the defensive line. If you want to use this shout, you need to make sure you have players with speed and off the ball running. Furthermore having the ppm ” trying to beat offside trap”, “one two passing” will only increase the likelihood of them being played. Workrate however defines if this is successful, If you expect the “pass into space” shout to work without high workrate on the targetted players then you are screwed. If your players have poor passing and decisions you are screwed. Knowing whether your players can actually execute this combo is important. Furthermore, playing against a defensive side who are camping could see you being hit on the counter if you fail to find space, so you need to be able to stretch a camping defense to make this work, which is why i love using fullbacks for width.

Overlapping Play and Side Passes

Now we come to a combination of shouts I have seen quite a few people using. Personally I do use them but one needs to know what they do.

The overlapping play shout, reduces the amount of runs that are being made by your central players and increases those on the flanks. This allows them to overlap. There is one important consideration: Spatial Awareness. If there are 2 players occupying the same space, overlapping won’t happen, or if it does, it happens for a reason.  Assume you have a winger on attack and a fullback on attack and you choose overlapping play. Both players are going to make a beeline for the flanks. In cases like this, you can opt for a ppm on the winger for cut inside or a PI for the fullback to cut inside. This way you increase the variety of movement.

Work ball into box has changed. It used to only affect long shots, decreasing them when you elected for this shout. Now it also reduces crossing as well. This is important to bear in mind, Whilst you may find players overlapping, you may also see players holding the ball up looking for a side pass, since you elected for this shout. This is when I set up “whipped crosses” which happen to be a low pass that’s drilled across the face of the goal. You can still use the shouts in combination : overlapping and work ball into box, but you need to know how they interact.

Passing Control

The tempo shout is another important one to understand. It not only increases the rate your passes move on the pitch, it also affects the directness of your passes and the off the ball movement of your players. If your teamwork, otb, pace, stamina, natural fitness attributes are low, then expect injuries low conditioning and gaps. I love the tempo shout, I use it a lot, but I also have a strong bench strategy, and, this is one shout I treat like a gas pedal in a game.

Shape shouts are important to grasp as these affect your spatial positioning on the pitch. The width shout narrows your width, but its not a defensive shout per se, It can be an attacking shout, since your players are packed together making them easier to find with short passes. The players who go wide will be the ones dictated by their roles, such as complete wingbacks.  Going narrow does affect your defending in midfield if you playing with a narrow shape. It effectively increases the ground that your midfielders need to cover, and, this could leave flanks open. If you are using this shout and find that balls are moving too easily down the flanks, you need to first look at whether their teamwork is low, and then you may need to consider changing a role in midfield to make it a better screen for your defense, like i did in my earlier 4312 example.

Shape Control

Pushing up the defensive line or dropping deeper is not one of  my favourite shouts, I tend to like how my players are spread out, but if i am forced into using this shout, I am keenly aware of how it affects my defending. Pushing up a defensive line decreases the distance between midfield and defense, but increases the gap between defense and your goal. So if you are using a defensive/ counter system and you push up your defensive line you are flattening your defense, While it can make an impenetrable wall, its also dangerous, cos a pass into space behind your defensive line can leave you exposed. At times like these my central defenders have a cover/defend duty combination creating one more line of cover, and my keeper goes sweeper. This increases a lot of risk, but if managed well it can be a good defense, but probably the hardest to master.

I have avoided talking about the other shouts cos I hardly ever use them I have never used the exploit flank shout, I absolutely hate any shout which goes long passing, it may be useful if you are using a deep 4231, and I probably would use it if I had such a system, but using it requires you to have the right players for it..good passers, and good receivers. Its like playing a quarterback and looking for a wide receiver with a Hail Mary.

How many shouts do I use? 5 atm

There are other posts on this blog which cover aspects of spatial control, a lot of what I wrote about in FM12 is still relevant in FM15, especially when it covers aspects of control green grass, and I do hope this post has helped.

Affecting the AI’s Spatial Control can be done via Opposition Instructions, and your own shape, one thing though: Hard tackling can displace your shape, cos your players will elect to slide in when they should be staying up. Sometimes its better to only pick a few critical players to hard tackle, tight mark. If a player loves to cut inside, you may find that work ball onto other foot, may suit him more, so you could end up gifting him a run, so know your targets before you OI them.

#FM 13, Shouts and Opposition Instructions

I’ve been thinking of doing this for a while now, a blog about how to use the Shouts and OI effectively, I remember covering the basics Shouts in Detail and here. The purpose of this update is to put this information all down together and simplify how its presented. Before we begin lets establish what some of the sliders mean.


Defensive Line

Basically this is how far how defense is willing to push up from their goal to support an attack. So if you are playing a high defensive line then your defenders are further away and suspect to the through ball, or and over the top pass (OTT).  High defensive lines are common if you are chasing a game and mean that you are exerting pressure on the other team to clear their lines quick, but you are leaving yourselves vulnerable to quick attacks. And since your midfield screen is going to be in the opponents half, it means that your backline must have the pace and awareness to defend.

If you notice that your players are having to backtrack a lot and this will come up on your highlights then your defensive line is very high. Generally a containment strategy only requires that your defenders only take a few steps to receive the pass, if they need to run backwards, you are not playing a containment strategy.

Marking

In real life we have only two kinds of marking Man and Zonal. Tight marking was ubiquitous with manmarking for many years. Man- Marking is a defensive strategy to mark a specific person on a pitch instead of marking a certain zone on the pitch.

It was perfected in the 60s and 70s by the great Italian sides of that era with their catenaccio formations. It quickly became popular but it didnt provide a spectacle since players who did the job of tight marking would invariably not be involved in attacking plays. Its a tradition thats been slowly dying and the only real side to employ it generously was Greece in the European Championships of 2004. In fact only 1 out of the 16 sides that made the Euro Champions League quarterfinals employed manmarking. You may find it used more often in lower league football or when a clearly inferior team is up against it with a good side.

Zonal Marking is currently more popular since players are designated specific zones to cover. When a player enters a zone a specific player is then tasked with marking him. You can also mark the player tightly and when he leaves one zone and enters a new zone that player continues to be tracked. This is particularly effective against sides who use a lot of movement on the pitch and it the failure of man-marking’s handling of fluid football systems saw the rapid adoption of zonal marking. Zonal marking requires communication and teamwork to be successful.

Where zonal marking struggles is in defending set pieces and this is where man marking can be employed.

In FM2013, it isnt hard to employ either of the two systems. However I am a huge critic of specific and non specific marking in the game. The game ideally should only have specific man marking. The very notion of “non specific ” man marking makes no sense. If you are man marking a specific position on the pitch that logically should be zonal marking, since zonal marking by definition is the marking of a specific zone.

If you want to employ a form of marking that denies the opponent space in crucial areas of the pitch, just use zonal and tight marking. Zonal marking works by given specific players zones, not the whole pitch is covered of course which is why you will see players disengage and moments when an opponent is “unmarked” but once the opponent enters the ‘danger zone” of another he gets marked. How early this happens is a function of your defensive line, closing down and whether you have tight marking on.

If your defensive line is too high chances are he would already be leaving players zones really fast, since the workable area to defend is smaller. A high defensive line compresses space on a pitch and means that your fullbacks, defenders and DMCs see a lot more work. So setting closing down instructions that are too high will displace your formations and leave vulnerable holes. To counter this what I always do is identify the threats that come from the OI and thats how i employ marking.

I do not employ any man marking, all i do is zonal and tight marking. Since I want to compress the allowable space and to get my players to engage and shut down the opposing sides passing patterns early, I opt to TM their wingers and ball crossers. If its a 442 formation I normally opt to use the Opposition Instructions to close down their fullbacks and TM their wingers.

Any formation that has an outright flanking attack can be shut down using OI. The instructions you have at your disposal include Player Specific and Position Specific Instructions:

  1. Tight Marking
  2. Closing Down
  3. Tackling
  4. Show Onto Foot

If I am faced with a side that is playing with fullbacks and wingers, I know that by shutting the flanks down I give myself a lot more options TM, Closing down and Show Onto foot can all be used. My AI Manager is using a 41212 narrow so I set things up by closing down Keeper, and fullbacks and TMin the AMC and Closing down the DMC. By doing so i shut down its wings and its centre. So thats my overall plan, how well I execute it is going to be done via shouts and my formation. Both sides are fairly evenly matched in my example.

So lets assume you are facing a a narrow 41212 formation and you are playing a wide 41221 formation.  Your immediate concern when you go into the match should be the middle of your park, since the AI Manager is using a DMC and an AMC, its most likely going to exploit the middle. I am also playing away in this example and up against a team that is on par with me. So to set things up I will head in with a standard strategy but I will attempt to control space in the middle

You have several options, personally I would then look at my shouts and divide them up into several categories:

  • Defending Shouts: Retain Possession, Clear Ball to Flanks
  • Controlling Shouts: Pass to feet, Play out of defense, Work ball into box
  • Attacking Shouts: Pass to Space, Pump Ball into Box, Hit early cross, Run at defense, play through defense
  • Desperation Shouts: Get Ball forward, Shoot on sight
  • Space & Aggression: Play Wider, Narrower, Higher, Deeper, Stay on Feet, Stand off , Get stuck in

I hardly every use Hassle Opponents, its a good shout but it effectively affects tight marking, closing down and your defensive line, for me personally thats too dangeous, I like to control things a lot more which is why I tend to start all matches Play out of defense and Work ball into box. In this scenario I am playing standard so I will push higher and go narrower since I also want to exploit the middle as the AI does it at the same time. Essentially I am locking down the flanks and going toe to toe with the AI in the middle of the park.

Essentially thats one way you can combine all the shouts into a kind of package, to do so would require you at least understand what all the shouts do. So before you go an click every shout, at least go read the manual or cleons notes on shouts.


FM13, Keeping it tight

Attack well and keep it tight

One of the biggest challenges using the tactical creator is actually having an attacking tactic that actually keeps you air tight at the back. To be perfectly honest, I have never ever set my defensive line that high. If you look at the attacking and overload tactics the defensive lines are invariably around pretty high and when you look at the closing down its almost 80% or higher on the slider. Basically you have a lot of chickens running on the pitch. When closing down is high and the defensive line is high, its pretty easy to get pulled out of position. Players will drift between your channels and find it easier to find space. Its pretty risk, and whilst I love attacking, i definitely dont like conceding as many as i score. So I basically rolled back my FM13 to my slider settings of FM 08 and guess what they make sense cos they work

Logic of a tight-ship

When top flight teams defend, you will see them defending high up on the pitch, and I totally agree with that strategy especially if your mentality is high. If you decide to take up that posture, you need to make sure there is balance in the team. Whilst your attacking players should be closing down all over the pitch, your defensive players should not. If you are the subject of balls over the top and inside forwards making it behind your fullbacks ..(note: message “XXX is getting skinned far too often), then your defensive line is a bit high. Since the tactical creator is very much still a baby as far as i am concerned, it will improve in the future; for now though there are some things you can do.

  •  2 Step Mentality

Mentality is no longer about position alone, it also affects risk/reward assessment when a player decides to run, pass, shoot, tackle or screen. If you want the extra risk with an attacking tactic but you want to maintain defensive cohesion, then have a 2 step mentality system, you can make it three if you want, but assume for now we are doing 2. Set the attacking group on attacking say 15 and set the defensive group on 11. Make sure its not more than 4 otherwise you will see gaps in midfield. If you do want to make it more than 4 than stick you MCd or DM on 11 and your defenders on 10.

What you have now done is created two groups of players, since the mentality gap isnt very large they will still move as a unit, but the defending group will be slightly more defensively inclined than the attacking group

  • Closing Down.

This part is easy. Look at your attacking group and turn them into chickens. Set their CD to max and get them to run around. If you have a really creative player in there you want to stay in an anchor positon, set his cd to low. 1-8 should be enough, as long as its own area., For your defensive group set them to close down to own area. What this will do is create a screen from the attacking group and keep the defensive group locked to their zones until a player enters their zone and then they will engage. Fullbacks tend to engage earlier cos their defensive zones are larger.

What you have now down is given players instructions on how far you want them to close down and how much. For you final piece of the puzzle, set your defensive line. This sets the “when”. There is absolutely no necessity to have a DL of 17, you can have one, but honestly whats the point? If the other team doesnt get a chance to come out of their box sometimes you need to really go exploring looking for space. What I do is set my defensive line close to normal (13). I will then proceed to observe, if i need to choke them I reduce width, if i need to reduce their space further I increase my defensive line.

Defensive Strategies

Continuing on with my theme on keeping it tight.. If someone comes up to me and says playing defensive means I need a low d-line and a defensive mentality, I’d probably just laugh. The fact that people think so one-dimensionally is the real reason why they struggle at the game.

Celtic 2-1 Barcelona

Celtic had little by way of possession against a superior technically gifted Barcelona side and still managed a famous victory. Neil Lennon played what looked like a 4411 formation, and yet while they appeared to ride out a lot of luck, this was one side who maintained an attacking threat throughout the game. The Celtic approach was basic, instead of playing a high closing down game in midfield they concentrated on keeping it tight on Xavi Hernandez and Andres Iniesta. Celtics midfield picked the right moments to assert pressure and made sure that Xavi and Iniesta’s presence was kept minimal, forcing the Barcelona fullbacks to become the main outlets, and these fullbacks were being marked tight zonally.

Essentially the strategy simple, keep the play narrow. Barcelona tend to play the ball on the ground, they don’t have a lot of tall players so Celtic kept the pressure by denying them the space they needed, conceding the wider areas to them. Celtic played them off the counter and whilst the possession stats were firmly in the Catalan’s favour, the foul count show how cynical they were. Barcelona was wary of Celtics counterattack, it was fast. Conceding setpieces turned out to be the downfall of the Spanish side.

To sit back and defend against a superior opponent isnt always possible, its like staying locked in your house while you wait for robbers to pick your lock. Why dont you get some guard dogs and turn your defense into attack. In FM13, the best defense is a good offense. But whilst you go looking for goals you will usually come face to face with sides who are superior to you in every way. The strategy to face them is simple:

  • Know if you need to go narrow or need to shut out their wingers

Some sides like Barcelona have an offensive triangle of players, they play through the middle because thats where most of their assists come from. For these kind of teams you need to go narrow and utilise OI. If a side has strength out on the flanks, then you reduce your fullbacks, keep their closing down to own half at most and set marking to tight. Let your players track them and deny them space.

Make sure you don’t concede your offense
Taking a defensive line and reducing it to your goal-line, isnt defending, its a slow death. A better strategy would be to ensure that most of the fight happens in the middle of the pitch, keep your defensive line around the middle and use tools such as shouts to play ball out of defense and work into ball and play to feet. Now if you dont use shouts it just means you go and tick those instructions on players. Essentially what you are doing is closing down in own half to own area. That way you keep the passing channels in midfield closed up as much as possible. Then you OI their creative players.

  • You need outlets to relieve pressure

Whilst the first two points should be able to see you increase interceptions, you also need players to be quick off the counter. This is where pace comes in. Your wingers need to have good first touch and pace to take the ball deep into the opponents half. One thing you can do is to set up some players to have pass to TM as an option for the break. If a counter presents itself then that hailmary pass could lead to a goal.

Shouts in detail

Shouts are the best way for you to tweak your tactic on the fly whether or not you use a custom tactic or not. Understanding what shout effects which slider is the key if you a custom tactic builder.

For people who customize their tactics like me they wont find it useful unless, you use the tactical creator and then ADJUST individual settings, when you do that you can still use the shouts. But, you need to know exactly what they affect. Theres no point using a customized mentality setting and then go use the Exploit the Flanks shout. Your mentality settings wont change. And this is where Shouts come into play. Shouts allow the person who uses the tactical creator to get the best out of his system. Its his way of tweaking the tactics on the fly. We were tweaking tactics manually before 2009, but now SI have included tactical presets in the form of the tactical creator which allow you to choose a mentality system whether its a global one where everyone is on the same mentality (Very Fluid) or where we have 3 distinct groups of mentality (Rigid) and a whole series of mentality systems that fall somewhere in between with the rest.

While some may want to fine tune the mentality systems like me, its important to realize that you can get the best out of the shouts if you know which sliders they affect. I for one usually use a few shouts in game even with my customized setup.

The three shouts listed below are probably very commonly used, but I will need to incorporate Philosophy and Strategy into this thread, cos they all affect what happens in a game. Nothing can be discussed in isolation. This thread comes from all the frustration I feel reading threads in the bugs forum where people cite the engine for failing to provide players who run across the D-line or play that elegant through ball.. its possible. I have a very strong feeling that whilst a lot of older players more used to sliders have become adept, a newer group of players who come on using the TC may not understand the interplay between sliders, shouts, and such.

These shouts(the ones below) I use more commonly, cos I do use the tactical creator, but i adjust the mentality sliders to suit my style of play. I leave everything on loose zonal cos i find that in games where i need to impose tactical discipline these shouts actually come in very handy. In a lot of games you will find yourself either stuck on a narrow pitch or you could end up facing someone whos determined to play through the middle. In such a case I use Opposition Instructions to shut down their most influential passer of the ball in midfield and then switch to wider. I also turn on hassle opponents, but this needs to be done with caution. It affects tight marking and closing down. If you are faced with a technical superior side this instruction can actually work against you cos you are closing down more. It works well on narrow pitches, but on wide pitches its really counter productive. Its far better using individual settings to shut down players or tight mark them.

In this case i usually just ignore hassle opponents and since i like to play with 2 teams of players..ie defensive/attacking. I set up tight marking on the attacking group and set them up..cos AMLs with TM the opposing FB.

On paper, you hear commentators remarking how players should do whats below. The reality is much harder. Even in the game its much harder to get it off. It requires a great deal of stamina and determination. If you have neither in high quantity, be prepared for winded players. The look for overlap instruction will set players off down the flanks. It works by getting midfielders to hold up ball to make room for the FBs. Now whilst this looks ideal, players need good otb and good decisions as well as passing. There are other shouts I havent listed which come in very handy when you want to do this and they include the Work into Box instruction. Setting your wingers to roam out of position, coupled with higher Creative Freedom which you can customize, you can actually create effective inside forwards for your FBs to exploit.
.
I usually like to to see FBs come up the pitch and inside forwards pick up the ball and run inside to give the FB unmarked space to exploit. Setting roam, plus FWR does that for them. So whilst the overlap shout is good, you can make it better by customizing the creative freedom and roam instructions.

Ok so those are your basic shouts

Whats interesting is how shouts can drastically alter your game plan.

Assume you decided one fine day that you wanted to go make a 4231. There you are sitting down, sippin ya coffee and you think that Control and Fluid are fairly safe. You think they both have the right balance of attack and control. You arent far wrong, I do that almost all the time for all my tactics so you decide to set this up

It aint half bad most of its set on default and normal..and if you look at the mentality settings “control”, and you look at how the mentalities are spread “fluid” you reckon its pretty balanced.

Tbh its a pretty safe way to start, yeah my mentalities are a bit different cos i want one full back to be more attacking orientated. Now when you get to the team settings page you can always do minor things eh? You can make em drill crosses, ah there is also an instruction to press more. Who doesnt want to press more? All things being equal we all love that extra press dont we, and you hear it on the telly that the players should press more. So you choose to make some modifications which would be natural..So you add the pressing instruction and you tell em to drill crosses and you choose to get your players to be a bit more aggressive.

Yeah why not eh?

Now by doing that little press more instruction your defensive line just went up a few notches..chances are a lot of people would have missed that. Now you start the game and you decide, hmm I want to play retain possession and make sure i play in their half..( at least thats what they all say they do on the telly and you decide to make two shouts: RETAIN POSSESSION and PUSH HIGHER.

VOILA!

Now look at your defensive line..

Congratulations you just took a control mentality tactic and set the DLine to max whilst also telling your players to hold possession when they ahve the ball in their half and to press a lot more when they don have the ball..if you dont concede a goal you must have God playing as a Keeper

Here is where a lot of people seem to have problems, its understanding how the wanton use of shouts can unbalance a tactic. Even if you were to take a standard tactic, failing to understand how shouts can move things around can make you lose out.

FM2013 Basics Strategy, Philo and Shouts

Football Manager isn’t a hard game to master, but before you can do that you really need to understand the basic concepts in the game. I have always been good at the tactical side of the game and this is where I will focus primarily.

There are essentially two ways you can make a tactic, you can essentially use the tactical creator or you can customise it. The tactical creator is actually just a bunch of presets based on the sliders you find it the game.

If you use the tactical creator, you need to choose your strategy and philosophy first. Essentially these set up as broad parameters for the team in general. When you set up player roles say change a player to BWM from DLPM then his individual settings change. Individual changes you then make, for eg if you tick a player and you modify his mentality settings and say his passing, nullify any effect shouts have on them.

As long as you leave the boxes unticked, their role works within the tactic as a whole. You could theoretically set half the team to respond to shouts and leave the other half immune to shouts. But the shouts have become a very effective way of changing the state of the game along with roles.For instance you could go change the strategy to a defensive posture since that affects their mentality, but its always important to check how your shouts can affect a team. The purpose of this thread was to show that misusing shouts can have a devastating effect on your game

IMHO default tactics are fine, they are better than they were back in 2000, when default tactics were so bad i had to make a whole set of new default tactics and post them up on the forums. Today the tactical creator is a lot more finished as a product, default tactics such as the 4231 work fine outta the box. Even the default player roles make sense. You arent gonna go out and win every game by 3 goals, but you certainly find yourself tough to beat. If you don understand the nuts and bolts of tactics, the default tactical creator is so much better than what we had in the past. What one needs to do is absolutely learn what the shouts do and how they affect you.

My popular shouts
These are the shouts I always turn to for some strange reason these are usually the only ones i use.

Play out of defense is a favorite of mine. Once or if they ever fix the Keeper Distribution bug, this will become way better. I reckon the challenge in fixing the bug is that the instruction may ship a lot of goals for the guy using it. At least thats the rationale in my head. This shout is almost a default starting shout for me, and in line with my short passing philosophy it allows me to build up play.Work Ball into Box is another shout and i usually pair both shouts together. Its part of my package i use during the prematch team talk. Once the game kicks off I pay attention to other stuff. This instruction is especially helpful when combined with the the first one. It leads to patient buildup from the back and around the box. While you may see a lot of lateral passing, more often than not it creates really good goal scoring chances.

I do believe that Look for Overlap is a great instruction, I can even remember how it came about. There were many people who were struggling to make their players overlap and this shout was born. Now whilst on paper it does the basic stuff, you need to be aware that using this shout has the effect of pushing your fullbacks into a more attacking posture. To get the most out of this you need to make sure somewhere in your team you know if your wingers are going to do inside runs along the opponents defensive line. To find out you need to first check if your wingers can do that via ppms and attributes. Once that is done check to see what kind of passing you are using to unleash them. Work into Box means that more often than not the ball will move left and right a lot before space opens up and the fullback charges in or the inside forward makes a run for it.

A lot of how you use shouts depends on your formation. You have a 442 and want inside forwards running? Not easy but doable. Its always best to start with formations that encourage IF play. such as the 343, 424, 4213 or the 4231. The look for overlap shout is very powerful but people who customize their tactics wont need to set that up if they know how to use individual instructions to get them to do that work. Eg, Winger passing set to short or direct and FWR set to mixed. If FWR is set to often he is actually making the run forward not waiting to do the overlap
Push Up Higher I use this shout a lot in the game to squeeze play, but when i do use this shout I make sure two things are set..either I use Hassle Opponents or i set up tight marking for my wingers and fullbacks. The biggest fear i have when using the push up high shout is that while i may be pushed up, my players may not have the wits to counter fast and skilful forwards. Pushing up because you think you are the better side, is normal. It forces play to be squeezed. Add the narrow pitch option and you suddenly throw in a cramped midfield. It is quite the option for squeezing play, but if you dont pay attention to your flanks you will be overrun.

Shouts can be very powerful if used right. In fact a person using a default tactic should do reasonably well. I ran a test on my assman gave him a default 4231 and just set up the roster..took a holiday for 2 months to come back and discover he was doing pretty well. If an ‘assman’ can do it anyone can. We dont call them assmen for nothing